Home Blog Page 3

How to Craft a low cost Hypertufa

0
How to Creat a Hypertufa

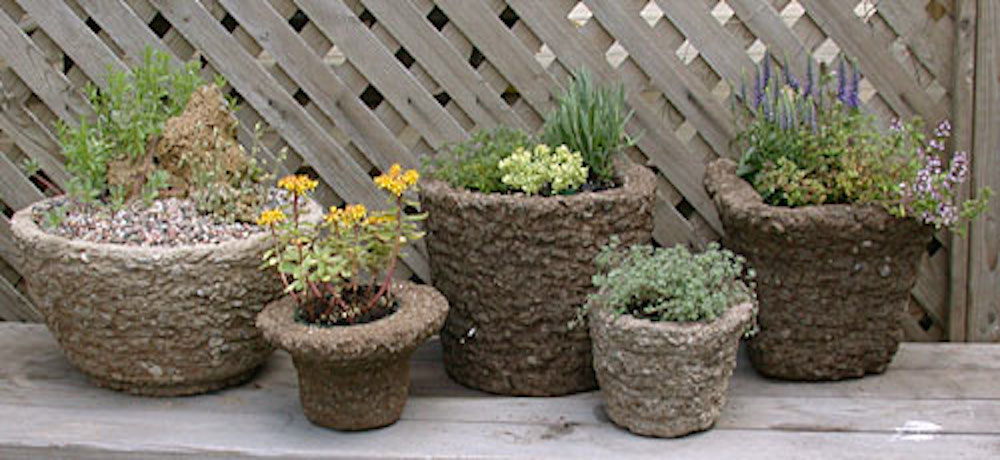
Hypertufa planters are lightweight yet durable and make perfect little container garden. Make several and group at different heights.  You can also make birdbaths, stepping stones, spheres, or other garden accents using hypertufa.

What you’ll need to make a Hypertufa Planter

  • Wheelbarrow or bucket
  • Rubber gloves
  • face mask
  • Portland cement
  • Perlite or vermiculite
  • Sphagnum peat moss
  • Polypropylene fiber
  • Mold of your choice
  • Dowels
  • Sheet Plastic or plastic garbage bags
  • Knife or chisel
  • Wire brush

Step One

In a wheelbarrow or bucket, while wearing rubber gloves and a face mask, mix 2 parts portland cement, 3 parts perlite or vermiculite, 3 parts sphagnum peat moss (sift or break up clumps with your hands), and a handful of polypropylene fiber, which helps strengthen the planter.  Mix the fibers well so they don’t clump.

Step Two

Slowly mix in water (a), paying close attention to the consistency of the mixture.  The goal is a mud like consistency (b), If it’s crumbly, add water. If it’s sloppy, add dry mix.

Step Three

Press mixture into the bottom of your mold to form a 2-inch thick base.  Continue pressing mixture up the sides of the mold, packing it as densely as possible and creating walls with an even thickness of about 1 1/2 inches (c). Spray mixture with water as needed to keep it moist while your work.  We made a disposable foam mold, but if using plastic, metal, or other reusable mold, line it with plastic sheeting to make it easier to remove the planter.

Step Four

Make drainage holes by pressing a few dowels into the base and through the mixture to the mold (d).

Step Five

Place the mold on plastic and completely wrap in plastic.  Let cure for two to three days.

Step Six

Remove mold from plastic.  Remove the dowels and then the planter from the mold. A knife or chisel may be needed to loosen the mold.  Scrape outer edges as desired using a wire brush.

Step 7

Allow planter to dry and cure for at least four weeks outside but out of direct sunlight. Your cured hypertufa can be left out in freezing temperatures as long as it is off the ground.  From the extra mix, we made hypertufa feet for our planter.

Step 8

If you want to “age” planter, encourage moss growth by painting the outside with yogurt.  Keep the planter moist and shaded until moss develops.  Once cured, you’re ready to plant.

Magic Bullet Blender Review

0
Magic Bullet Blender Save - Best Smoothies

The Magic Bullet Blender is sold and created by Homeland Housewares, a company that specializes in products for everyday use in the home. They make products that have improved upon many household products that are available already; products that work for day to day needs. The Magic Bullet has been a popular appliance for many years, mainly because of the popularity of its infomercial.

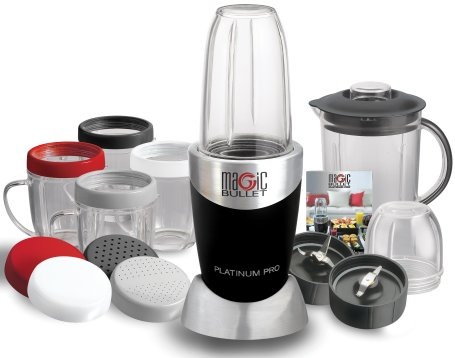
The Bullet is a compact blender that has many purposes in the kitchen. It comes with a powerful base that allows all of the attachments, such as juicers, blenders, and food processors, to do their jobs. So why would one get a Magic Bullet instead of other blenders or food processors? Convenience and speed are the two most important factors. For one, all elements of the Magic Bullet except the base can be easily washed in a dishwasher. It also does not take up much room on the counter, so it can be used for everyday meals without having to be stowed away. The Bullet is also a very fast blender. When it is new and the blades are in good condition, it can blend food in only a few seconds. This can make cooking or blending very simple. The Magic Bullet is offered in two models: The Magic Bullet Express and the Magic Bullet Deluxe. The Express is a 17 piece set that comes with a power base, a tall and short cup, two blades, shaker tops and lids, 4 party cups with colored lip rings and a 100 page recipe book.

The Magic Bullet is great for Diet Smoothies!

Smoothies can help you Lose Weight!

Why are Smoothies a great way to lose Weight?

Diet Smoothies contain scientifically proven foods that naturally burn fat and lead to significant weight loss. Diet smoothie recipes are healthy additions to any diet plan. If you are looking to lose weight then healthy smoothies are a great option. Combined with proper nutrition and a well-rounded exercise program, smoothies can really go a long way in helping you shed those unwanted pounds. Basically weight loss and diet smoothies fall into two categories, meal replacement, and fat burning.

Meal replacement smoothies serve as a healthy alternative to a standard meal. They can also be used as between meal snacks. Where you used to grab some chips or a coke you should go for a smoothie instead. They have many vitamins and nutrients as well as the necessary calorie count to keep you going through the day. With the right ingredients, you also can get sufficient amounts of protein and carbohydrates. Meal replacement weight loss smoothies can also be low in fat and calories so that they fit in well with your weight loss plan. We have a wide selection of smoothie recipes on our site that can serve as meal replacement smoothies. Such as different recipes for you to choose from with popular weight loss ingredients used as the base for each smoothie. The other type of weight loss smoothie is Dr. Oz fat burning smoothie. These smoothies are made up of specific ingredients that are designed to aid in burning fat naturally. You can add fat burning supplements to your smoothie as well if you want to boost the effect even more, however many natural ingredients will work just fine.

Kitchen Design Tips

0
Kitchen Design Ideas

When planning a remodel, staying on top of the latest kitchen trends can help you to avoid building a kitchen that will look dated in a few years.

At the same time, most homeowners don’t want to be out front on a hot kitchen trend that fizzles out prematurely, leaving them with a “formerly hip” kitchen. What do you do? Review the trends we’ve identified here, and then use this knowledge to enhance the designs that you already love. Above all, if you plan to keep your home, remember:

Minimalist kitchens have been making a major surge recently. Simple styles, limited colors, flat planes, and minimal ornamentation describe this recent trend. “Simple and clean” is a common refrain used by our readers use to describe their favorite designs.

Despite what you might think, minimalist kitchens don’t have to be ultra-modern. Below is a traditional kitchen with a minimalist twist: Its monochromatic color scheme speaks of modern simplicity, while the simple moldings and butcher block countertop add a classic style and warmth to the design.

It is possible that the minimalist kitchen trend is a reaction to the excesses of the housing boom, or perhaps just a natural response to the slower economy. Either way, we think a minimalist undercurrent will be here for some time, because such clean and simple designs are usually practical and rarely showy. Both traits are marks of a longer-lasting movement that shouldn’t look dated any time soon.

Best Handy Lawn Gadgets

0
Best Lawn Gadgets For Great Lawns

Outside forces to get a beautiful Yard!

Trim, mow, haul, and shovel your way to the best yard on the block with these handy garden helpers. Now that Spring is finally here we are all looking forward to spending more time outdoors in our own little oasis. So create your perfect outdoor paradise with these powerful lawn tools.

Briggs and Stratton Mow and Stow Engine & Compact Lawn Mower Reviews

Briggs Stratton Mow and Stow Engine & Compact Lawn Mower

What it is:

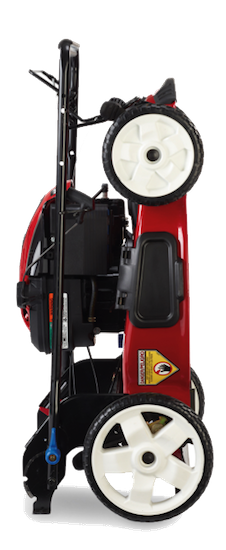
This gas-powder mower folds up in three simple steps and stores upright. A revamped engine design ensures gas and oil won’t leak.

Why it is liked:

This models takes up 70 percent less floor space then traditional movers. The fold-up design also makes the underside easily accessible for maintenance.

Featuring convenient variable speed self-propel and front wheel drive which allows for smooth maneuvering around complex landscaping and obstacles. The 3-in-1 mowing system – bagging, mulching and side discharge capabilities giving you the flexible performance in all mowing conditions.

The lawn mower can be folded and stowed in three easy steps, with the mower’s deck remaining in an upright position. No need to fear oil and gas spillage, as the Mow ‘n’ Stow technology will keep liquids in place.

The system could be stored safely with a full tank of gas without spilling, To accomplish this, it redesigned some the vents and put in some new oil seals. Features such as toggle locks have been conveniently placed on the lower handlebars so it can be locked safely into place when stored.

Fiskars Power Gear Bypass Pruner

Fiskars Power Gear Bypass Pruner

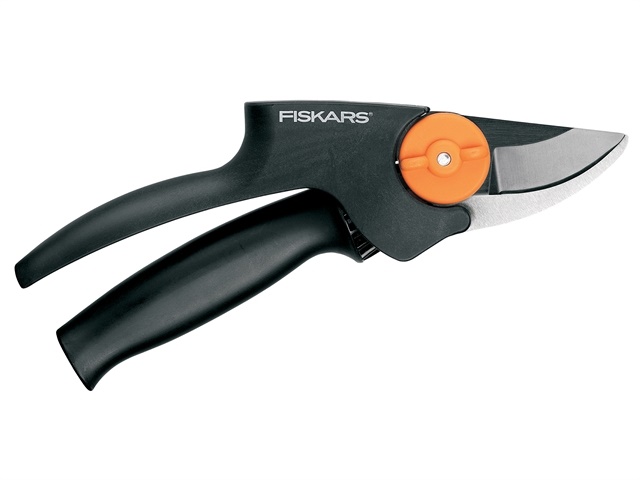
What is it? Gears multiply leverage so these pruners can easily cut through branches up to 3/4-inch in diameter without a hand work.

Why is it liked?

A contoured handle and secure-grip touch points provide ease of use.

Easy Ways to Replace Rotting Siding Areas

0
Quick Fix Rotted Area siding

Has some of your siding begun to rot while the rest is still good? Don’t replace all the boards. Follow these easy steps and just replace the boards that are rotted. Decide which boards need replacing and where to make your cuts. Stagger butt joints if you’re replacing multiple courses. Use a square to mark the cutting lines, centered on a stud. The nailheads on existing siding will indicate stud positions.

Cut the nails

Cut the nails at the bottom of the row above the boards you’re replacing. Use a small hacksaw with a sharp blade. Cutting the nails will let you remove rotted boards without damaging those your’e saving. To get at the nails, carefully wedge out the bottom of the siding 1/8 to 3/16 in. with wooden shims.


Make the first cut with a circular saw

Cut out bad sections with a circular saw or even a sharp utility knife. Be sure to stagger the joints (see Photo 1). Most hardboard siding is 7/16 in. thick, so set your blade depth carefully to avoid cutting into other courses. Use shims to lift the boards so you can easily get at the one you’re cutting.

Do It Yourselfer - Replace Rotted Siding

Finish the cut with a sharp utility knife

You won’t be able to complete the cuts with the circular saw, so finish the cuts with a sharp utility knife or a keyhole saw.

Pry off the rotted boards

Remove rotted boards with a flat pry bar. Protect sound siding with a scrap piece of 1/4-in. plywood. After you remove the rotted courses, use a small hacksaw to cut any protruding nail shanks, or if you have a very strong grip, use a good pair of wire cutters.

Install the new boards

When you replace the boards, use a homemade “reveal set” jig to match the reveal of the existing siding. The courses should overlap by at least 1 in. Replace siding by working from the bottom up (you might need a helper here). Attach the siding with 10d galvanized box nails driven into the overlap at least 1/2 in. above the bottom edge. If you have insulated sheathing, predrill the nail holes to avoid crushing the insulation.

When hardboard siding is installed and maintained correctly, it can hold up for 30 or 40 years. But without proper attention, isolated areas can begin rotting in only a few years, especially near the foundation. Water splashes up from the ground, frequently soaking the vulnerable bottom edges. The paper face then flakes off, exposing the dark brown inner layers, and each soaking accelerates the rotting.

Replacing these rotted areas takes only a few basic tools and a few materials, but it can make a huge improvement in your home’s appearance. Hardboard siding doesn’t cost that much, so it’s often worth it to replace an entire course. Doing this helps you avoid unnecessary butt joints.

WiFi Thermostats – Latest Trend

2
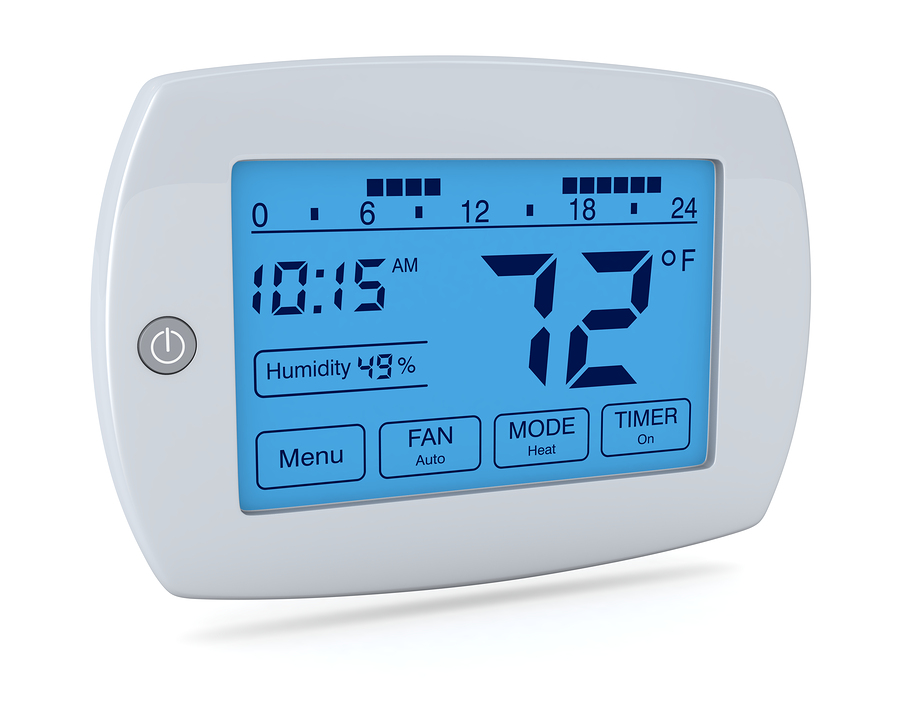
Honeywell Digital Thermostat

Do Programmable Thermostats Save Money?

The short answer is yes

More precisely, they save families an average of $300 to $400 a year on energy costs. According to Energy Star, an average household spends close to $2,200 a year on energy bills, half of which goes toward heating and cooling empty and unused spaces. In other words, people are spending too much to heat and cool their homes and are wasting energy in the process. If your energy bills are getting out of control, a simple, programmable thermostat may save you thousands of dollars over the lifespan of your heating and cooling systems. And there is more to these devices than just saving money. They make it easy to preset the best temperature for you when you sleep, wake up, go to work and come home. Using less energy means you are helping the environment.

WiFi Thermostats Available – New Trend

As more and more people connect to the Internet for services, a new trend is emerging in thermostat design and functionality. Now, many thermostat models come with the capability to connect right to your home’s WiFi, allowing you greater control over your home’s heating and cooling needs even when you aren’t home.

The Advantages of Upgrading Your Thermostat

If you’re tired of having to worry about constantly adjusting your thermostat, consider the advantages a programmable one has to offer:

  • Programming: You can set your thermostat setting according to time of day and day of week.  That allows for pre-determined settings that automatically change your HVAC output without you having to worry about it.
  • Savings: Programmable thermostats have been shown to save homeowners up to $180 per year based on an annual average of $2,200 in home heating and cooling costs. That more than makes up for their initial purchase price.
  • Design: Unlike the box-like thermostats that sat as an eyesore on your wall in the past, new programmable thermostats come with backlit display panels that have touchscreen controls.

Try this highly recommended Wi-Fi Programmable Thermostat


Honeywell Wi-Fi 7-Day Programmable Thermostat

Shop Now and Save on the WiFi Thermostat

Honeywell TH8110U1003 Vision Pro 8000 Digital Thermostat


Out-Door Paradise Ideas

1

What a beautiful oasis! Designing an Outdoor Paradise is becoming more popular these days. I think you would agree that this inviting water – garden oasis is absolutely beautiful and maybe a little extravagant. But it is so amazing that there would be no need to be indoors.


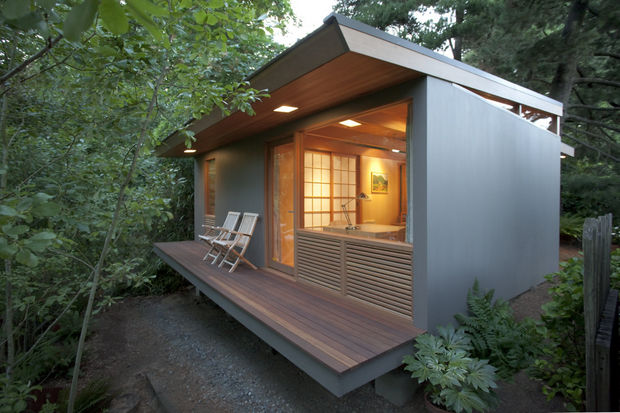
Another perfect relaxing outdoor idea is to take your indoor space outdoors. And this cozy interior – exterior space would put you in the perfect state of mind. Enjoying some down time has become increasing harder for most of us so creating spaces of relaxation and harmony are essential for de-stressing.

Design a Perfect Outdoor – Indoor Oasis?

Outdoor Indoor Designs Ideas

Freestanding Bathtubs Trends

0

A renewed interest in the freestanding tubs has design firms rolling out an array of incredible bathtubs that are aesthetic and economically viable. New Designs are bringing an aura of luxury, elegance and affluence to the standalone bathtub that is all about revolutionizing your bathroom and enhancing the pleasure you receive from a refreshing soak! With a freestanding bathtub, you can combine that refreshing soak and that remarkable view to generate a actually spa-like setting that is enhanced by the touch of nature!

Bath Tub Free Standing Trends

tub-trends

Ultra modern design give this contemporary bathtub a custom feel.

Mountain-Views-free-standing-tub

Imagine soaking in this free standing tub with Spectacular Mountain Views or the soothing sight of crashing waves in the distance or beautiful tropical green canopy are increasingly getting to be a portion of interior design! 

How to Make a Garden Bed

0
Grow the Perfect Garden

What you will need to make a Garden Bed:

  • Garden Hose
  • Flour or marking Paint
  • Sod Cutter (optional)
  • Sharp Spade
  • Garden Rake
  • Compost

How to Make a Garden Bed

Step 1

Using a garden hose, outling the shape of your garden bed.  Strive for a shape that allows easy access to plant rows.  Mark the shape of the bed with flour or marking paint and remove the hose.

Step 2

Remove the sod with the help of a sod cutter or a sharp spade.  Work diligently to remove the turf’s entire root zone.  This will make for minimal weeding later in the season.

Step 3

Loosen the soil in the garden bed with a spade.  Sink the spade into the top 6-8 inches of soil and turn it over.  Use the spade to break up clods as you go.

Step 4

Spread a 2 inch layer of well-decomposed compost over the entire garden bed.  Use a spade to mix the compost into the top 6 inches of garden soil.  Rake the mixture smooth in preparation for planting.


Fresh Herb Garden How To

0
Garden How To

HERBS AND SPICE DEFINITIONS

The term “herb” has many definitions. It is often defined botanically as an annual, biennial or perennial that does not produce persistent woody tissue. This, however, would leave out many aromatic trees and shrubs that are often used as herbs. A broader definition might be any plant or plant part that is used for its culinary, cosmetic, medicinal or aromatic qualities. Spices tend to be more aromatic or fragrant than herbs and have a pungent taste. Spices are generally produced from flowers, fruit, seeds, roots or bark, while herbs are generally made of fresh or dried leaves, although there are some exceptions.

Grow the Perfect Garden

GROWING CONDITIONS

A 10 feet by 12 feet area generally supplies ample space for an herb garden for an average-sized family. It’s wise to devote one side of the garden to perennials and biennials and the other side to annuals, which need to be replaced each year. Many herbs, however, are well suited to an edible landscape where their dual natures can be exploited. Good examples include perennial sage with its purple flowers and savory leaves, and Florence fennel, whose long, fern-like aromatic leaves surround stems topped with small yellow flowers in an umbel-shaped head. Soil for an herb garden should be well prepared. Early in the spring, fertilize the soil with a balanced fertilizer and ample quantities of compost. Bed design varies according to the mature sizes of the select plants and the watering technique. Best results are generally achieved with drip irrigation and mulch. Wood shavings, straw, pecan hulls, dry bluegrass clippings or other organic mulches help cool the soil, reduce water evaporation and salt buildup, discourage annual weeds and reduce the amount of soil splashing up on leaves. Planting depth and distance between plants varies with herbs. Some herbs are best propagated vegetatively. Insects and diseases are rarely serious problems on most herbs.

PREPARING HERBS AND SPICES

Stems, flowers, and leaves can be tied together for curing in small bundles and hung upside down in a dry, shady location (such as a garage, shed, or kitchen) until dry. Leaves and flowers also can be dried in a shallow tray in the shade. Dry leaves and flowers can then be pulverized by rubbing them between the palms and fingers. Store in airtight glass containers in the dark. Seeds from plants such as coriander, anise and dill can be collected by placing the dry heads in a paper sack and separating the seeds by hand.