Home Blog Page 5

Vegetable Garden How To

0
Fresh Herbs How To

Vegetable and fresh food gardens are the rage this year. With all the focus on green living and organic foods, it’s not surprising there is a push towards growing our own food. If you’ve ever eaten a fresh picked tomato, you’ll know that the flavor just doesn’t compare with store bought. In fact, most people probably don’t realize how good vegetables are supposed to taste.

For those of you who have never attempted growing anything beyond a few token geraniums or hanging planters, food gardens are not that difficult. If you devote some time to planning, you’ll be shocked at how easy it is.

Your first consideration should be in the type of plants you want to grow. One tomato plant can yield as much as 10 lbs. of fruit, so you don’t need many to get a good return. Plus, depending on the type of plant, allows you to harvest throughout the season. Other plants such as carrots, radishes and corn produce only once.

The varieties you choose will have bearing on the size of your garden and vice versa. You can use a regular plot, or build raised beds, or even fill a balcony with containers of edible plants. Most vegetables require a minimum of 6 to 8 hours of full sun. Much less and they won’t be as hearty as well as being susceptible to disease. You can budget your sunny space by placing some vegetables in part sun such as peas, lettuce and spinach.

Your garden will have to be watered regularly, especially during dry spells. You may want to consider using soaker hoses or a sprinkling system set up on a timer.

Good soil will produce a heartier crop of more nutrient rich plants so it’s worth spending some effort in this area. Use a moist, well-drained soil that has been fortified with compost. A good way to test it is to soak a small area of soil, wait one day and then dig up a handful. Give it a good squeeze, and if water streams out, you may have a drainage problem that would require adding additional compost or peat moss.

If, when you open your hand, the soil falls apart, not forming a ball, then you may have too much sand. If the ball holds together and doesn’t come apart easily, you may have too much clay in the soil. Adding organic compost or peat moss will solve both of these problems. Ideally, you want the soil to form into a ball and break into crumbs when you disturb it.

Garden Design

There are two basic designs when planting in the ground versus raised beds or containers – row cropping and intensive cropping.

In row cropping, you have number of plants, single file in long rows, with room for walking in between. Although most people automatically plant this way, this style is generally used in large gardens where room is required for large equipment. This design, tends to use up a lot of space for walking paths and this eats away at your planting room.

Intensive cropping is where planting is done in wide bands up to 4 feet across. Since this design reduces the space needed for walking, the planting bands should not be any wider than you can reach to weed your garden.

Another version of intensive cropping, divides the garden into small zones (about 4 x 4 feet), throughout your yard. Depending on the size of plant at maturity, you can use one, four, nine, or 16 plants. If you leave part of the area unplanted, then you can add a second planting when the first is finished. It’s common to plant lettuce, radishes, green onions, carrots and beans several times a season.

Raised beds are an excellent planting method, especially if you have poor soil drainage. They also help to keep the weeds down and restrain your plants from creeping into other areas of the garden. An easy way to create the bed is to place your frames right on existing lawn, line with plenty of newspaper and top with soil. The newspaper will break down, and attract worms which will provide plenty of natural fertilizer.

No matter which method you choose, once you’ve loosened the soil, rake it, water it and let it rest for a few days before planting.

The Solutions on Which Wood Glue to Use

1
Wood Glue Home Fix Solutions

Top Wood Glue home Fix Solutions

Take the guess work out which wood glue to use to make your fix it job complete. If you have ever been stuck when it came to choosing the right adhesive for a wood repair, you know how confusing all the options can be. There are glues that dry instantly, glues that must be mixed with water, glues that should never touch water, glues that work only in certain temperatures and if you pick the wrong one, your fix likely won’t last. To help, we have rounded up some common sticky home fix it situations and their glue solutions, all of which deserve a spot in your toobox.

Fix a Cracked Drawer Product Solution

Elmer’s Carpenter’s Wood Glue: Save Now:

Shop Now Carpenters Interior Wood Glue-7.625 Ounce only $7.49.

Glue to Use: Yellow polyvinyl acetate (PVA).

A step up in strength from white craft glue (another PVA), this water-based adhesive creates a strong wood to wood bond.

How to tips: Glue both surfaces and clamp them together for a least 30 minutes: reaches full strength in 24 hours.  If the seam oozes, wipe immediately with a damp cloth.

One to try:

Fix Joints on Stain-Grade Molding Solution

Glue to Use: Stainable PVA.

This glue has the same forumla as yellow PVA with the addition of wood fibers.  The result is a beige paste that accepts stain.

How to tips: First, test how well the glue accepts the stain with scrap wood.  Then apply to one side of the joint and press the edges together, securing them with clamps or finishing nails for 1 hour. The glue will cure to full strength in 24 hours.

One to try:

Max Bond Glue

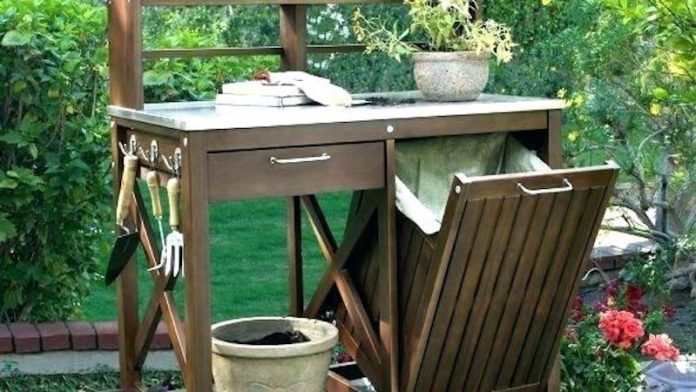
Fix Broken Potting-Bench Shelf Solution

Glue to Use: Water-resistant PVA.

This glue is similar to other yellow PVAs but it repels water, so it works well for light outdoor repairs.  In most cases it’s so effective that the wood around the glue will rot or crack before the glue fails.

How to tips: Apply a heavy bead to one side, then clamp for 30 minutes.  Leave the joint alone for 24 hours while the glue cures.

One to try:

Titebond III Ulitmate, $7 for 8 ounces: Amazon.com

Shop Now and Save on Titebond 111 Ultimate Wood-Glue.

Fix a Loose Chair Stretcher Solution

Glue to Use: Polyurethane.
This adhesive sticks to wood, metal, and even old glue.  When exposed to water, it expands as it cures, reducing the wiggle room in loose joints.

How to tips: Wearing glove, lightly dampen one side of the project, then add a thin layer of glue to the other side:  Clamp for up to 2 hours.  Clean up spills with paint thinner.

One to try:
Gorilla Glue Polyurethane, $11 for 8 ounces:

Shop Now and Save on Fast Cure Gorilla Glue, 2 oz.

Fix Splintered Fence Picket Solution

Glue to Use: Two-part epoxy.

Made by mixing a resin and a hardener, this ultra-tough glue sets in about 5 minutes, fills ragged gaps, and resistes water and most solvents.

How to tips: Using the glue’s double barrel syringe, measure out the correct 1-to1 ratio.  Wear gloves and clean up drips with acetone.

One to try:

Loctite Epoxy Quick set, only $14

Shop Now and Save on Loctite(R) E-20HP(TM) Hysol(R) Epoxy Adhesive, Fast Setting; 50ML [PRICE is per CARTRIDGE]

A New Trend in Solar Energy – Solar Roofing Shingles

0
Which Solar Panels are Better

With so many people concerned about our impact on planet Earth, it’s no wonder that renewable energy has become so popular. One way that you can do your bit for the environment is to have solar panels fitted to your roof which then take the energy from the sun so that you can use it in your home to either replace or supplement the electricity you take from the main grid. Although you probably already know of the existence of solar panels, you may never have heard of solar roofing shingles.

Basically it’s a roofing material made from solar shingles and can be used for commercial as well as residential properties. If you have a conventional roof covered in slates or wood etc, then you might even feel you want to replace it with solar roof shingles when your current roof has come to the end of its life. Some people might even argue that you’ll recoup the expense when you go to sell your home as this is the sort of thing more and more people are interested in having due to environmental concerns.

Both solar panels and solar shingles are referred to as “building integrated photovoltaic” (BIPV). Basically this means that the panels are integrated into the building during construction. However, in saying that, they can be added to the building at any other point. By having solar shingles or panels on your roof it means that they are an unobtrusive form of renewable energy, especially compared to wind turbines. If they have been designed into the roof then it will have the appearance of belonging. In other words, it looks as if it should always have been there. With wind turbines for instance, they can be very noticeable and aesthetically unpleasing especially if you live in a traditional home where a great big turbine on your roof or in your garden would look very out of place. MP David Cameron even had a turbine installed on his home and many of his neighbours complained because they felt it looked ugly in a conservation area.

Solar roof shingles are designed so that they look very similar to other types of roofing material and come is a dark purple/blue color. You may or may not think they look good on a roof but many people really like them and feel they work very well aesthetically speaking. If you want solar roofing shingles that are black in color have a look at the shingles provided by SunPower as they blend very well into S-Tile and Flat roofs.

Luckily in a number of parts of the world there are number of government grants available for solar technology. This used to be something that you couldn’t get so you had to pay the full amount yourself but this has changed now. Because of new thin film solar technology processing it has become a whole lot easier to produce and work with plus they are much more attractive in appearance. If you have a pitched roof then opting for small tiles or shingles is a good idea. For those with a flat roof you can have either large integrated panels or you can go for one huge layer of solar film.

How you want to use your solar panels depends on how much power you can generate from them. They can either be “on grid” or “off grid”. On grid basically means that your home will still be connected to the national grid and if you’re lucky enough to produce more electricity than you need, that excess can be sold to the grid. If however you don’t get enough sunlight to cater for all your energy needs, you can still use the electric grid for power. The panels would therefore be seen as a supplement to your regular electricity supply.

Off grid essentially means that you are not connected at all to the grid. This means you don’t receive electricity and you don’t sell electricity to the grid. This system would be better suited to home that is very rural and doesn’t have access to power lines and you get enough sunlight to fulfil all your energy needs. If you don’t get enough sunlight then it’s advisable to find another source of renewable energy to compliment you solar panels. Geothermal and wind turbines are two examples of renewable energy you should investigate. Generating enough energy from solar panels alone is very difficult so is not something most people do.

For some people having solar roof shingles and panels installed, the environmental benefits are all they really care about. However for many others, they are concerned about cost of purchase, installation and reducing their energy bills. Therefore people are asking “how long does it take to recoup my investment?” This is a very difficult question to answer simply because there are so many factors involved. Such factors include, amount of sunlight, positioning of solar panels and energy consumption of your household. However as a general rule, you can expect to see a return on your investment after 10 years due to saved energy costs. However the number of years could actually drop if energy costs continue to rise and the cost of solar panels become more affordable.

Before you consider buying solar roof shingles or panels, there are some pointers you should think about, these include:-

  • How much sun do you get each year? If you live far away from the equator you will have a lot less sun than if you live somewhere like Florida or Malaysia and you will find that the solar panels are considerably more efficient than if you live in Toronto or London.
  • What direction does your roof face and are there any surrounding buildings or trees that could block out light? The more light your solar shingles get exposed to, the more electricity you can generate.
  • How much is your electricity costing you just now and is it likely to increase?
  • If you are thinking of selling your home in the near future, you need to think about whether potential buyers will appreciate solar panels on the roof.

If you have decided to go ahead and have solar shingles installed you should always get a licensed and qualified dealer to do the work for you. You will find local dealers by searching the internet or looking in the phone book.  While your’e at it, you might want to as about solar roof fans for your attic.

The more solar shingles you have installed, the more electricity you’ll be able to generate. However you don’t necessarily have to cover your whole roof in them. If you don’t have enough money to completely cover your roof you can opt to have sections instead. Also, some parts of your roof might be in shade which means you wouldn’t be getting efficiency levels anyway. Just put the shingles on the part of the roof that gets the most sun.

If you are worried about the durability of these solar shingles, don’t worry. They are designed to withstand wind, rain and snow just as well as any other roofing material. Make sure you compare all the different features for the different manufacturers. Companies such as Uni-Solar offer a 20-year power output and 5-year system warranty. Also find out if you need any ventilation system in place otherwise you could unwittingly make your guarantee void.

Being environmentally friendly no longer has to be expensive or difficult. More and more technology is being produced and governments all over the world are encouraging us to embrace renewable technology by offering grants. Solar powered roof shingles are also so flat and unobtrusive plus they’re just as effective as a roofing material as any other.

Reducing Air Links & Drafts in your Home

0
Drafty Door Prevention Products

The potential energy savings from reducing air leaks or drafts in the home can be as high as 40% per year. Caulking, filling gaps and adding weather stripping to eliminate a home’s drafts and temperature differences will help to make you feel much more comfortable in your home.

Here are some steps you can take to make your home more energy efficient:

Save up to 40% on your energy bill by Reducing Drafts.

1. Sealing Air Gaps in the Home:

According to the Environmental Protection Agency, air leakage can account for anywhere from 25 percent to 40 percent of the energy used for heating and cooling a typical home. That’s why experts say a $25 investment in four tubes of a home sealant to seal up drafts and leaks in a home could result in hundreds of dollars of energy savings. Proper sealing is a low-cost, one afternoon investment that will pay for itself in years of reduced energy costs and increased comfort.

How to Guide on Sealing Gaps and Cracks in the Home

Look for gaps, cracks or leaks around window and door frames, in the attic and basement, anywhere building materials join, and any areas where the walls are penetrated, such as electrical and plumbing fixtures. Look for daylight that’s visible through cracks around window and door frames.

Use lighted incense sticks to locate the source of leaks. Air drafts will cause the plume of smoke to waver or flow in the direction of air leakage. As an alternative to using incense smoke, you can use your dampened hand. Drafts of air will feel cool on your damp skin.

While there are a variety of sealant options, silicone sealants, such as GE Silicone II, are thought to provide the best seal against water and the elements because they don’t shrink or crack and they remain flexible. Additionally, they can be used indoors or out. Paintable silicone, such as GE Silicone II XST, provide the benefits of a silicone sealant for applications that require painting. In addition to reducing energy leaks, some sealants contain ingredients to control other household risk factors, such as unhealthy and unsightly mold and mildew.

Make sure that the surface you are sealing is clean and well-prepared. Clean any dust or dirt particles with water. Do not use soap. Use a knife to remove any remnants of old caulk. After you have removed most of the old caulk with a blade, clean any remaining residue with a mild abrasive or rubbing alcohol.

2. Add Weather Stripping and Sealing Products to Reduce Drafts in the Home:

Seal Off Leaky Old Windows

Did you know that an old drafty window can be made to perform as well or better than a top of the line window with respect to keeping out the cold by simply adding a few dollars worth of shrink plastic over the top? That is because the plastic forms an air-tight wind barrier and also coverts your old window and storm into a triple pane window

Seal Off Leaky Old Doors

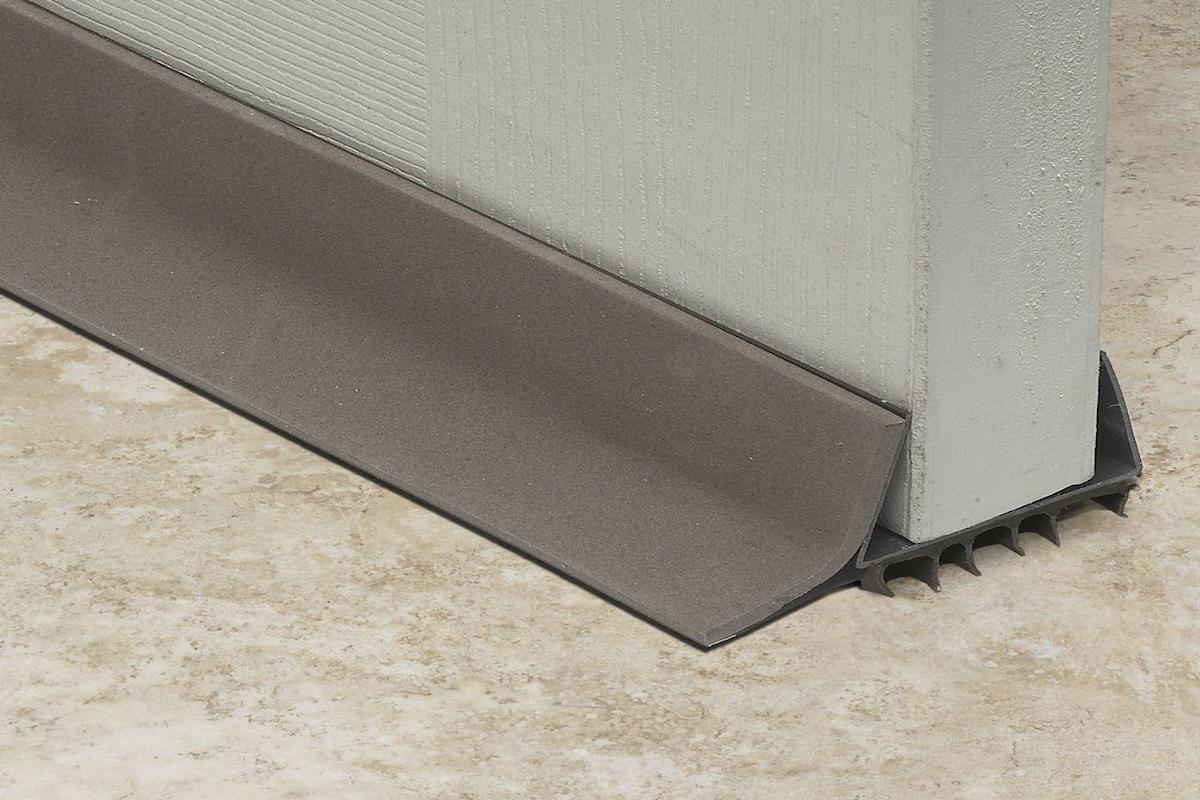
Doors can be a major source of heat loss since the heat can quickly be transported out cracks and gaps. The solution is to seal off these gaps. And it doesn’t cost much! One place where a lot of heat escapes is along the bottom of the door. A solution is to install a threshold seal like the one shown in the photo on the left (click to enlarge). In this particular door, I also have a seal along the bottom, but it doesn’t hurt to add the extra seal since this is where the coldest air will be.

Product Recommendations for Sealing Gaps under the Door:

Drafty Door Prevention products.

The Twin Draft Guard – it’s easy it Slides right under the Door.

The Twin Draft Guard is getting great reviews at working wonders in blocking out drafts, but only if you have the right door, reviewers say. The foam tubes are easy to trim to the proper size, and installing the Twin Draft Guard beneath a door is simple. If the space between the door and floor is small enough, and the floor isn’t carpeted, the Twin Draft Guard tends to stay in place and successfully blocks drafts from homes.

Users who have larger gaps between their doors and floors find that the Twin Draft Guard doesn’t work for them. At best, it doesn’t create an airtight seal; at worst it tends to either get stuck under the door, or the door opens right over it. Those who have carpeted floors also find that the Twin Draft Guard gets stuck on the carpeting, rather than gliding smoothly over it like the commercial demonstrates.

How to Calculate the BTU’s Size Air Conditioner for Room Size?

0
How to Calculate the BTU's Size Air Conditioner for Room Size

Stay Cool this Summer and Save Money!

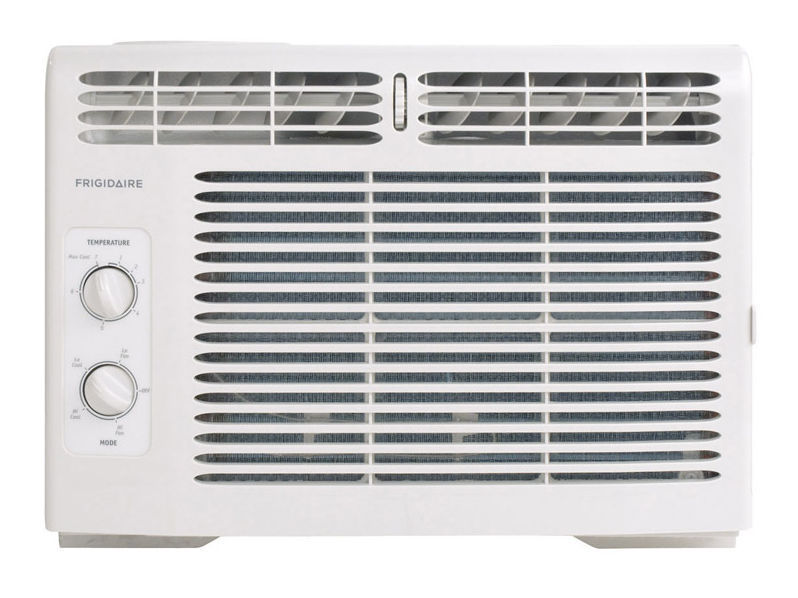
Air conditioners come in sizes ranging from 5,000 BTU’s all the way up to 24,000, so before you purchase an air conditioner you need to calculate the correct BTU’s for the  room you are looking to air condition.

Don’t Waste Money on the incorrect Size Air Conditioners

How to Calculate the perfect size Air conditioner?

  • follow the step by guide below to get your dimensions for the perfect size air conditioner.
  • A living room that is 17 feet long, 15 feet wide, and 9 feet high. So I multiplied 17 by 15 by 9 which equals 2,295.
  • Now you need to figure out which direction the most exposed wall of the room faces. Look around the room to find the answer – is it east? north? south? or west? Look at east as having a value of 17; west as having a value of 20; north’s value is 16, and south is 18. The value for north is 16. The wall that is most exposed to the outside elements in my room is the north side so I multiplied the 2295 by 16.
  • The resulting calculation is 36,720.
  • Next determine your home insulation status. If your home has poor insulation, use a 4. If the insulation is good, use a 5.  And, if the insulation  in your home is excellent, then use the number 6. My home is good. A “good”  is a number 5. Finally, I divided 36,720 by 5.
  • The resulting number is 7,344. After I rounded it off, this told me that I needed to purchase a 7,000 BTU air conditioner.

Great savings on air conditioners at Amazon – the sharp s60PX has gotten some great reviews!

How to Unclog the Sprinkler System?

0
How to Unclog the Sprinkler System?

Most sprinkler systems over time due to dirt, algae, hard water deposits, particles and other debris can become clogged. If your sprinkler system becomes clogged, or the water pressure isn't as strong, it is time to clean out  or repair your sprinkler system.

Sprinkler System Check List – Get it Working Properly:

  1. First turn off your system to relieve water pressure.
  2. If your system has a filter, check it for damage and replace as needed or unclog it with water pressure.
  3. To prevent future clogs and rust stain be sure to change your filter at least once every three months.
  4. If a cloged or damanged fllter isn't the problem check your sprinkler heads.  They might not be working properly because of blockage or damage so clean out or replace heads as needed.  Most home improvement stores that carrie parts for your system.
  5. Check your system's water pressure to see if it is at the right water pressure for your system to work right.
  6. Check your pump, if you have one, see if it is working at the right pressure.
  7. If you use outside water supply, check pressure on the system and check to see if all valves are open.
  8. Check sprinkler system manual for help with your system parts and repairs.

Home Repair Must Have Tools!

0
Must Have Home Improvement Tools


It doesn’t matter whether you own a home or you are renting, every home needs to be maintained or repaired. As long as you have a roof and four walls that you call home, you will need to repair, install or update that home. And all those home newbies should definitely get prepared with the home maintenance and repair essential tools. It will make it easier to enjoy your home.

Home sweet home isn’t always so sweet when it comes to maintenance and repair, which many people dread, but having the essential tools on hand can make it easier to handle. There are so many little home maintenance things we can do ourselves, which can save us money. And who doesn’t want to save money?

Whether you need to fix a leaky or clogged faucet , mount shelves to a wall, or just stop a table from wobbling, having a tool box that’s stocked with a few basic hand tools makes any home improvement projects easier and more affordable.

Buy a sturdy tool box, one that has enough space to add tools as necessary.

They can be purchased at any hardware store, Amazon.com, Home Depot, Lowes. A great place to look for tools, is a garage sale. You can get some great bargains.

Need tips on organizing your home maintenance tool box?

Just check out the tool must-haves below.

  • Hammer:

The hammer is a tool that is used frequently in the home, and you really cannot do without it. It is definitely a must have – you’ll use it for just about everything from hanging shelves to hanging decorative pictures.

Most experts recommend the claw hammer . The Claw hammer feature has that widely recognizable steel head, made up of a peen (the nail-driving face) on one side, and a claw (the crowbar-like nail-pulling lever) on the other. You’ll find that claw hammers are available in both rounded or flat peens. It is up to you, but the flat variety; because their driving faces are straight instead of curved, flat-peen hammers tend to strike nails more evenly, with less likelihood of you missing a nail and hitting your fingers instead.

  • Tape Measure:

You can save so much time by being accurate, especially when it comes to home improvement. Incorrect estimates can end up costing you both time and money, so do yourself a favorite and keep a tape measure in your toolbox to measure, well just about everything. When it comes to home improvement, you will use it for cabinets, carpet, garage shelving, furniture and window treatments, ect. All tape measures are basically the same design, but little details can make a difference.

For example, the wider the rule is, the more control you’ll have over it when it’s fully extended (wider tapes flop around less). Another handy variation is the magnetic-tip measure – Rare Earth magnets are integrated into the rule’s leading end, and hold it firmly to iron and steel surfaces while you measure… no hands needed.

  • Screwdrivers:

Because there are so many different screwdriver sizes and designs, it’s probably best to have a couple types of screwdrivers, so you’ll have what you need on hand when necessary. A screw’s “drive type” is defined by the shape or design stamped into its head, which a screwdriver blade fits into in order to drive or extract it. Since the most common screw drive types are slotted (with a straight line running through the middle) and Phillips (with a “+” shape), both slotted and Phillips screwdrivers are a must. And when it comes to sizes, it can get a little expensive trying to purchase each type of screwdriver in a range of sizes. To save money and toolbox space, you can always opt for a mult-bit screwdriver, which comes with a full set of interchangeable blade bits that can be instantly switched to suit any project.

  • Pliers and Wrench:

Both pliers and wrenches provide you with extra grip and leverage for home repair and maintenances around the house. Pliers are great for anything from pulling out nails to bending wire, and some types even have cutting edges built into their jaws for easy wire cutting. Wrenches, on the other hand, are the tools to reach for when you need grip combined with extra torque for tightening and loosening pipes, as well as turning nuts and bolts.

  • Level:

Hanging picture isn’t so simple when they are crooked and unbalanced. A simple project of hanging picture can turn ugly. Need to be sure that the length of chair rail you’re about to nail to the wall isn’t crooked? Well this is why you need a level. An option is a torpedo level, it uses air bubbles in three clear, liquid-filled vials to give you visible proof of a surface’s level. Each vial is set into the tool at a different angle (for complete level, plumb, and 45° measurements) and marked with fine lines. If the bubbles fall within these lines, you know that the surface is level. Having one on hand is especially convenient for those times when you’re working solo and need to determine whether something is level without the benefit of a second opinion.

  • Utility Knife:

A utility knife is an incredibly useful tools for any do-it-yourselfer, regardless of his or her skill level. They make quick work of slicing through cardboard, drywall, carpet, thin plastics, and even linoleum.

A stud finder is, quite simply, a tool for pinpointing the location of wood (and in some models, metal) structural elements behind drywall, tile, or most other wall surfaces.

When You Use It: A stud finder is essential for many home improvement projects. Installing crown molding, baseboard, chair rail, putting in closet inserts, hanging heavy items on the wall; all require identifying solid backing.

  • Stud Finder:
  • 3-in-one oil:

Sprinkler System Activation in the Spring.

0
Sprinkler Repair

Spring Sprinkler System Start-ups Checklist

The calendar finally reads “Spring” and time to put away the snow shovels and start enjoying the warm weather. But, before you put on those shorts and flip-flops you need to crank up the sprinkler system, consider the following as part of the process necessary to reactivate those slumbering sprays and rotors:

  • Make sure all manual drain valves are returned to the “closed” position before you turn on the water.
  • Turn on the main system water valve slowly to allow pipes to fill with water gradually. If these valves are opened too quickly, the sprinkler’s main lines are subjected to high surge pressures, uncontrolled flow and water hammer.
  • Manually activate each zone valve from the controller to maker sure the zone is operating correctly. Walk through each station on the controller, checking for proper operation of the zone.
  • Check for proper operating pressure (low pressure indicates a line break or missing sprinkler), proper rotation and adjustment of sprinkler heads, and adequate coverage.
  • Check and clean filters on poorly performing sprinklers. Adjust heads to grade as necessary. Check back-up battery and replace if necessary.
  • Reprogram the controller for automatic watering. Uncover and clean the system rain sensor, if applicable.
  • A sprinkler system can become clogged over time due to dirt, sand, algae, hard water deposits and other debris. To prevent your sprinkler system from clogging, make sure you change the filter every 3 months, it will help prevent your system from getting clogged. A filter will also reduce iron build up.  If your system does not have a filter, you can easy purchase a filter and install it yourself, refer to your user manual for the model number this will help you purchase the correct filter for your system.
  • Finally clean any in-line filters for drip irrigation zones.

Save on your Sprinkler System Products by ordering below from Amazon!

Purchasing the Perfect Size Air Conditioning Unit

4
How to Calculate your Air Conditioning Unit Size

Air conditioners are great for cooling us off during the hot summer months, but if you don’t choose the right unit you may never get that cool comfortable summer that you deserve.
Tips for purchasing a room air conditioning unit

A great way to cool a room on those hot summer days is by using a window air conditioner.  Did you know that  purchasing a bigger room air conditioning unit will not necessarily cool your room more efficiently during the heat of the summer?

The fact is that a room air conditioner that’s too large for the area  will perform less efficiently then a properly sized unit. And a unit that is too small for the room will not have enough BTU’s (British Thermal Units)  to cool the room at a comfortable cooling level. The cooking capacity of the unit is measured in BTU’s (British Thermal Units), the more BTU’s it has , the more space it will cool down.  If the unit doesn’t have enough BTU’s, the room never will become cool and comfortable. So before you buy that air conditioner you first need to figure out what size you will need for the room your looking to cool off.

And here is how you will calculate what size unit you will need for that room.  You need to measure the length, width  and height of the room. Then multiply the length times the width times the height will give you the calculated volume number of the room.

Now, you’ll need to figure out which direction the most exposed wall of the room faces. That is, which wall of the room is most exposed to the outside elements. Look around the room to find the answer- is it east? north? south? or west? Look at east as having a value of 17; west as having a value of 20; north’s value is 16, and south is 18. Use the volume of the room and multiply that number by the corresponding number for whatever direction you choose.

Finally, in order to find out what size of a window air conditioner you’ll need to purchase for your room, divide the result you last arrived at by the number which corresponds most accurately to the level of your home’s insulation. If your home has poor insulation, use a 4. If the insulation is good, use a 5. And, if the insulation  in your home is excellent, then use the number 6.

The result of these calculations will give you the approximate number of BTU’s your new air conditioner will need to have.

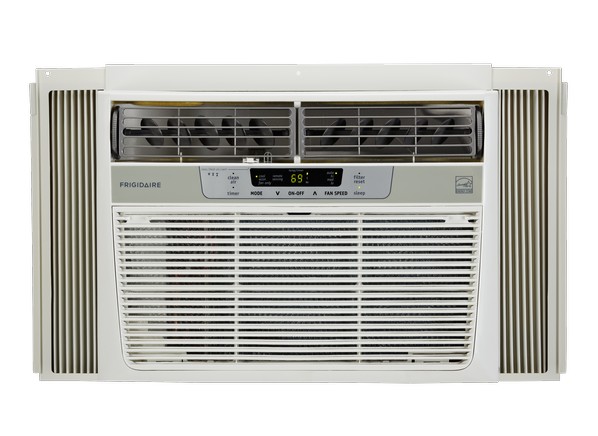
Here is an example of a bedroom with the correct size room air conditioner.

I purchased a window air conditioner for this room, and the formula described above gave me the perfect size. My living room is 17 feet long, 15 feet wide, and 9 feet high. So I multiplied 17 by 15 by 9 which equals 2,295. The wall that is most exposed to the outside elements is the north side. The value for north is 16.  I multiplied the 2295 by 16. The resulting calculation is 36,720. Next, I determined that the insulation level of my home is good. A “good”  is a number 5. Finally, I divided 36,720 by 5. The resulting number is 7,344. After I rounded it off, this told me that I needed to purchase a 7,000 BTU air conditioner. They come in sizes from 5,000 BTU’s all the way up to 24,000.

Need to buy an air conditioner save money on your air conditioner now!

How to Make Hanging Garage Shelves

0

hanging-selves-garage-how-to

For many homes, the garage is easily the converted stock room where items that the family does not use anymore are junked and stored away. As this is the case, the garage, all too often, gets really messy and unorganized. Sometimes, it is no longer used to park the cars in, especially when there are just so many items inside. This can be avoided with some cleaning and of course, a re-organization of the room.

Putting in shelving and cabinets almost always makes the room a lot better kept. Some homeowners, though, are a bit hesitant to do this thinking these add ons will take on additional space, thus making the room smaller. But you can actually built open type hanging shelves on your garage that can expand from wall to wall and floor to ceiling, where everything can be kept in order, and where the room is kept large and spacious.

Below are the instructions for making hanging garage shelves. You would need nails, hammer, saw and 2×4" lumber boards for this project.

  • First measure the area where you desire to have the hanging shelves installed.  Decide the depth and the width of the shelves and make sure that you get the accurate digits for this.
  • Following the measurements you already have, cut about four pieces of your lumber wood, matching the height of your area . These four pieces are going to serve as the pillars, or vertical support. Make sure to give this an extra two inches, as the extra inches would be where you will put the attachments once you hang this from the ceiling joints.