Home Blog Page 6

Installing Laminate Flooring | Basement

2
How to Install Laminate Floors Basement

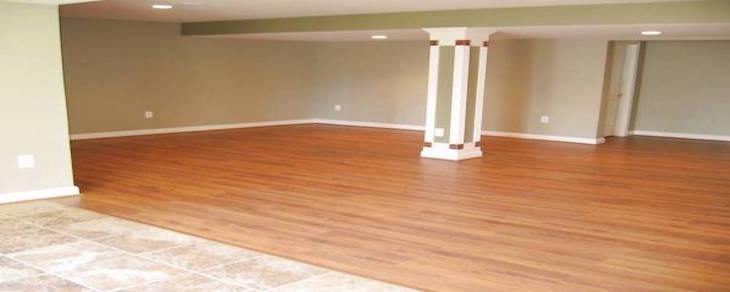
Laminate flooring is a great alternative to wood flooring, and is much more affordable. Your home will look and feel great without an expensive investment.

And laminate flooring is pretty easy to install with little or no maintenance. In basements, laminate flooring can spruce and add style to a dark sometimes gloomy room. Some basements, however, are not suitable for laminate flooring.

Here are some tips below to figure out whether you can install a laminate floor and basically, if you can eliminate moisture problems, you can install laminate flooring.

  • Inspect the concrete floor in your basement for sloped floors, cracks and large amounts of moisture.
  • Determine the residual moisture content within your concrete floor by cutting heavy plastic sheeting into 2-foot squares. Cut enough squares so that you can place one every 15 feet apart on your basement floor. If you have linoleum tiles, you can do this test on top. However, if you have any type of carpeting or solid linoleum, it will not work.
  • Place a square of plastic sheeting on the floor and secure it with duct tape, sealing all edges. If you are testing over linoleum tiles, include as many seams as possible underneath the sheeting.
  • Leave the test sheets alone for three days and then check each to see if any water accumulated underneath the sheeting. If it did, your basement is not suitable for laminate flooring. You may try applying a concrete sealer and retesting.


How to Install Laminate Flooring in the Basement:

1. Put down the subfloor, vapor barrier and padding on the entire floor, now would be a good time to do so. Usually, the vapor barrier and padding are included with the purchase of the laminate flooring.

2. Now you can start installing the laminate floor. First, using the tongue and groove, connect several planks together in a long row. Find a spare piece of wood (not the laminate) and use it to help you get the laminate in place. As you are attaching each piece, it may be necessary to put the spare piece of wood along side the laminate and tap it in to place in the grooves. The more planks you get on, the more sturdy and rigid the basement flooring becomes.

3. As you start adding additional rows to the basement flooring, be sure to stagger the seams. This will give the flooring additional strength as there is no clear break line.

4. You will eventually run across areas of the wall where you’re gonna have to cut the planks to fit. Measure the space between the wall and the installed boards and cut the plank. These planks are easily cut using a table saw. Table saws are sturdy and much safer to use than a hand-held circular saw for this type of work. You might need to use a pry bar (a short version of a crow-bar, caw-caw) to get it in place so don’t worry.

5. For irregular areas like corners or around imovable objects like poles, use a jig saw to cut the appropriate shapes so your basement flooring fits snug.

6. Keep going laying down plank after plank until your entire basement floor is covered.

Buy and save money on the tools you need!

Please note that for irregular areas like poles and corners you will need a jig saw to cut the appropriate shape so the basement floor fits snug. Please note some great deals from Amazon on Jig Saws Bosch 6.4 amp barrel grip has gotten some great reviews.

Winterizing Sprinkler Systems

0

Without proper preparation your sprinkler system might be damaged by freezing temperatures. Here are some tips on how to prepare your irrigation system for winter conditions if you live in a region where it freezes.

How to Prepare your Irrigation System for the Winter Months

1. Insulate your assets

Shut off the water supply to the irrigation system. The main shut off valve for your irrigation system needs to be protected against freezing. Make sure it is wrapped with insulation (foam insulation tape and a plastic bag) to protect it from harsh winter temperatures and prevent it from freezing. If you do not have a main shut off valve, you might consider installing one as a preventative investment. Also, any above ground piping needs to be insulated. Self-sticking foam-insulating tape or foam insulating tubes commonly found at home supply stores are fine.

2. Stay in control

If you have an automatic system then you will need to "shut down" the controller (timer). Most controllers have a "rain-mode" which simply shuts off the signals to the valves. The controller continues to keep time, the programming information isn't lost (start times, valve run times, etc.) and the clock continues to run throughout the winter. The only change is that the valves will not activate. If your controller is responsible for activating a pump, as a precaution you should remove the wires that are connected to the MV (Master Valve) and common terminals. This will prevent the possibility of the pump being accidentally activated which could cause damage from overheating.

An alternative to using the rain mode is simply to shut off the power to the controller. If you do, you'll need to reprogram the time and potentially all your other settings as well, in the spring. Make sure to write down the stations, start times and run times so you can easily reprogram it.

3. Drain the pipes

Now you need to remove the water from the pipes and sprinklers so that it won't freeze/expand and break the pipe. There are several ways to drain your pipes: a manual drain valve, an automatic drain valve or the compressed air blow-out method. However, since there could be potential safety risks we recommend contacting your local irrigation specialist. Many offer sprinkler winterization services this time of the year.

4. Protect valves and backflow preventers

Insulate backflow preventers and valves if they are above ground. You can also use insulation tape for this. Be sure not to block the air vents and drain outlets on backflow preventers.

Substantially Cut Your Energy Bills by insulating your attic

0

Insulate your attic save up to 40% on energy bill

Attic insulation is taken for granted many homeowners think they’re covered when they’re not. A well insulated attic will afford you a substantial savings on your heating costs.

Make a trip to your attic with a ruler/yard stick in hand, check the thickness of your insulation if the insulation under the rafters is six inches thick or less, you need to adjust your R-value. R-value is a rating of resistance to heat flow; higher numbers signal a better ability to protect against heat transfer.

Most attics need an R-value of 38 or more, which typically translates into at least a foot of insulation, (check with a local insulation retailer for the proper coverage in your area).

Not all insulation is made the same, and not all homes need the same insulation. “R” values rate the thermal performance of the insulation product you choose for your home.

The higher the “R” value, the greater the insulating effect. Because colder climates need more protection, recommended R-values vary across the country, so find out how much insulation you need (or log onto simplyinsulate.com).

New insulation isn’t cheap, but compare to what you loose in heating cost each year, it will pay for itself in no time, and it can lower heating and cooling costs by 25 percent in a single year.

And don’t forget, as of 2006, you can get up to $500 in federal tax credits for insulating your home (for more information, go to energy.gov and click on The Energy Bill and Your state).

Types of insulation:

Insulation is made from a variety of materials but usually comes in four types. You can find insulation materials at most hardware stores.
Rolls and batts are flexible products made from mineral fibers and are suited for attic or floor joists.

Loose-fill insuation is made of small particles, blown into place, and is commonly used for walls and attics.

Rigid foam insulation is a more expensive and thicker insulation used for buildings where large areas need to be filled.

Foam-in-place insulation is blown into walls and reduces air leakage.

Places for insulation:

• One of the most cost-effective ways to make your home more comfortable year-round is to add insulation in your attic. Adding insulation in your attic is relatively easy and cost-effective.

• Crawl spaces, unfinished, accessible areas, should be insulated.

• Basement walls that are left uninsulated can account for 25 percent or more of a home’s total heat loss. Insulate these walls to add comfort and warmth to your home.

• Interior walls should be insulated to create a snug and comfortable living space.

Sparky Newsletter

0

Get the latest home improvement and repair News updates. Are you looking for new design ideas? Or looking for some cheap and easy fix it solutions then you are at the right place. Sign up now it is easy and free.

Enter your email address for updates from sparky:

Delivered by FeedBurner

How to Install a Programmable Thermostat

0

Programmable Thermostats Save – $200 in Heating & Cooling Costs
 

What is a Programmable Thermostat?

A programmable thermostat allows you to pre-set your home’s heating and cooling system to work around your schedule, providing ultimate comfort for your household. 
Programmable thermostats help you ensure efficient operation of your heating and cooling system, resulting in real energy saving and lower energy bills.
thermostat Programable How To
 
The Steps to installing a Programmable Thermostat:
1. Make sure you turn off power to your system.
2. Remove cover from original thermostat and unscrew thermostat from sub-base.
4. Unscrew wires from thermostat's sub-base and take off.
6. Connect red wire to "R" screw, and white wire to "W" screw.
7. Drill new screw-mounting holes for base.
8. You need to make sure the holes are level.
9. Install wall anchors in wall to hold base.
10. Put batteries into the thermostat and put cover on.
11. Turn your power system on.
12. You are now ready to program your desired on/off temperature for your thermostat thanks to Sparky.
 

View this how to video


Insulate Water Heater Save 15%

0

Insulating your water heater, as well as the hot-water pipes, could improve hot-water efficiency. In addition, where plumbing is exposed in a crawl space or cellar, it can help to cover hot-water lines with foam insulating tubes. Technically, heat radiating through pipe walls isn't lost because it helps to warm the floors inside the house. But insulation that keeps water in the pipes warmer helps to deliver hotter water where you want it, and you waste less water running tepid water through the tap. Hardware and home center stores sell several variations of insulation materials.

A water heater insulation kit consists of an insulation blanket and tape to hold it in place. It is available in various sizes to fit heater of different sizes. Some water heater manufacturers, however, prohibit the use of insulating blankets around their heater. Before you purchase an insulation kit, refer to the instructions that accompany your heater or, call the manufacturer of the water heater. In addition, special care should be taken when insulating a gas water heater because if it is installed improperly it could pose a fire hazard. Use the instructions below as a guide while following the specific recommendations and instructions that accompany the water heater insulation kit.

Project: Easy
Estimated Project Time: ½ hour
Start Tips: Prepare a large clean surface for cutting the insulation blanket.
Start Tips: Follow the recommendations and instructions of the manufacturer of the water heater.
Recommendation: Do-it-Yourself

Get your Home Renovation tax credit!

1

A new home renovation tax credit would give up to $1,350 in tax relief on home improvement projects. The eligible expenses must be at least $1,000, but not more than $10,000, and the work would have to be done between Jan. 27, 2009, and Feb. 1, 2010. Now is the time to get those renovations done.

Insulate Water Pipes | Save Money

1
Insulating Water Pipes - Save Money

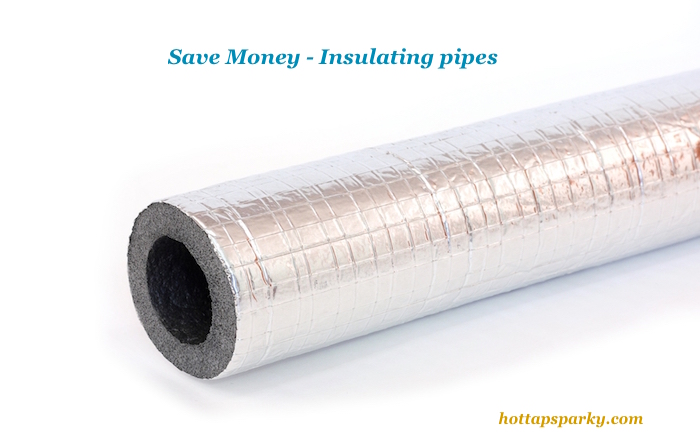
Insulating hot water pipes will prevent costly heat loss, while insulating cold water pipes will prevent condensation from forming and keep them from freezing in the winter.  Pipes the aren’t insulated will cause your pipes to work less efficiently,it makes your hot water heater work harder, and ultimately results in an increase of energy bills.

Cost: $1.50 – $7.50 / 6ft section of insulation Time: 1-2 hours, depending on amount of pipes

Supplies:

• Pipe insulation?
• Acrylic tape or Duct tape?
• Rag?
• Mild cleanser?
• Scissors, Utility knife ?
• Mask, Gloves, Safety goggles
• Tape Measure Instructions:

Insulated Water Pipes How to1. Begin by cleaning all exposed and accessible water pipes with a mild cleanser. It’s also a good idea to use this time to fix any leaks in the pipes. The pipes should be completely dry prior to installing the insulation.
2. Choose the insulation: either a faced fiberglass insulation or tubular sleeve insulation – tubular-sleeve is typically the easiest to install. If using the fiberglass insulation, wrap the pipe with a ½” overlap and be sure to wrap the insulation in plastic to prevent the pipes from dripping condensation. Secure all seams with either an acrylic tape or duct tape.

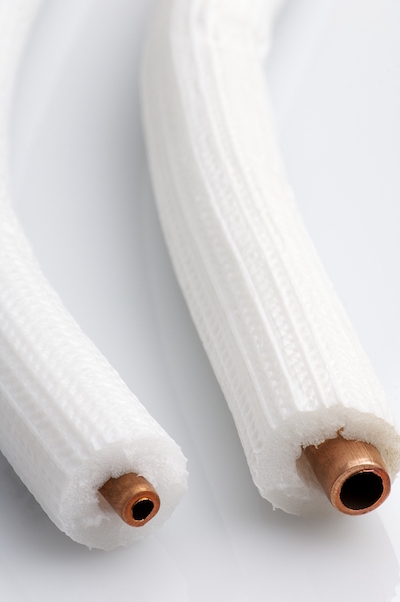
3. If using the tubular-sleeve insulation, match the interior diameter of the tube to the outside diameter of the pipe. Snap the tube seam-side-down and tape the seam using an acrylic tape or duct tape.

4. Regardless of the insulation type, be sure to cover the entire pipe when wrapping around corners and bends, and wrap with tape.

Sprinkler System How to fixes

0
Sprinkler System Maintenance Fixes

Sprinkler Maintenance Tips to keep your Sprinkler System running smooth all summer long.
Save money by keeping your sprinkler system running longer. Maintaining your sprinkler will extend the life of your system and save you money.

Prevent your Sprinkler System from Clogging

  • Over time due to dirt, sand, algae, hard water deposits and other debris sprinkler systems become clogged.
  • Help Prevent sprinkler system clogging by Spraying Weed Grass killer around your sprinkler system heads. It will help prevent clogging and help save money on costly future repairs.

TIP: Spray your sprinkler system heads with weed grass killer periodically, to prevent system clogging throughout the summer season.

Prevent Breakage by Installing Rings

  • Install rings around the sprinkler heads to prevent breakage.

Sprinkler System Maintenance Tips

Trouble Shooting your sprinkler system

  • Some of the most common controller problems are actually caused by power surges that can “freeze” the controller or garble the programs causing a sprinkler system to go down. Try unplugging system and disconnect the battery for 5 mins, then reconnect the battery and plug it back in, it will reset itself. Make sure to reset your sprinkler system’s memory.  If your sprinkler system still isn’t working, check the rain guard system and verify if the zones are working, if not manually activate zones by hand.

Cleaning the coils on your refrigerator will save you 10% on your energy bill.

0

stainlessfridgeClean the coils on your refrigerator it will help your refrigerator run more effiently if the coils are clean.  Clean refigerator coil will a  10% energy savings on your bill. To maintain this energy saving clean the coils once every six months!